If You're Not Melting Your Crayons You're Using Them Wrong
When was the last time you picked up a crayon?
Did you color with it?
If you did I hope you were lucky enough to have one of those cool crayon boxes with the built-in sharpener on the back. As a kid that’s how I knew I’d finally “made it”. . . when I got my first 100+ colors box of Crayolas with the sharpener built in. No joke.
Now that I’m older I’ll admit crayons aren’t the first coloring supply I stock my arsenal with. Nor would I think of abstract crayon art being a possibility.
My general stock for the past few years has consisted of mainly watercolor paints, some good ink markers, lots of fine point ink pens, and colored pencils.
Inspiration Source: Mom Trusted
These Jimi Hendrix wax projects are super cool! Definitely some patience and prep work required, but I love the watercolor kind of effect!
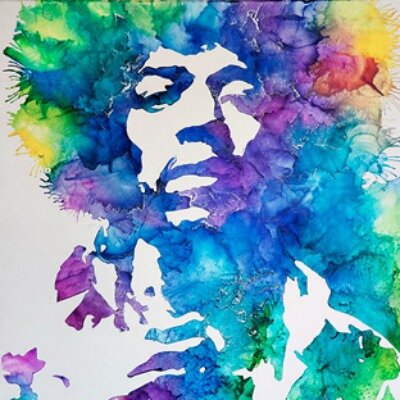
Seen on: ArtisticJunkie
Little did I know what I was missing out on. . .
So when I started to see DIY projects popping up for cool melted crayon wax canvas art, I ran out to the store and bought my first 100 pack of crayons in over a few dozen years and I haven’t been without them since.
There are a lot of ways to approach melting wax! The first piece I ever made was just like the video below.
I started by gluing the crayon colors I wanted in a straight line to the top of the canvas; then using a hair-dryer on low heat, I manually melted them until they liquified and left a beautiful ombre blend that dripped the entire length down — leaving only the little hollowed-out paper wrappers remaining at the top.
Check out the video below to see the effect! Whether you use a rainbow gradient or go with more tones and monochromes, this is a great way to start playing with melting crayons and wax art. Just make sure to lay some newspaper or a drop cloth down for the run off and any splatter.
This page contains affiliate links, which means I may earn a small commission if you use those links. For more info please see my Disclosure here.


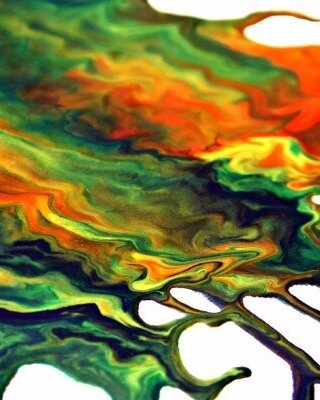
The photos and video below show a few other ways you can use a hair dryer or a handheld heater to get a more abstract, marbled-looking effect.
I like this look a lot, but I don’t own a handheld heater - which is better for this because it projects a more radiant heat. I found that the hair dryer made it much harder to control the wax, or I wasn’t as skilled at not burning my hand while holding the crayon. You either need to be holding your crayon in hand, like the video shown below on the right — or you need to get your crayon pieces slightly softened before you begin (otherwise your dryer will just blow the pieces right off the canvas).
I managed to get some pieces laid down, I think with hot glue, then attacked it with the dryer again; but once the wax had liquified completely, even on low power my hair dryer blew the wax around more than I wanted it to. It turned out neat and the colors still blended together in a pretty way, but it was more streaky and linear rather than the nice marbled pieces shown below!

Inspiration Source: Better Homes & Gardens
Inspiration Source: Happy Deal Happy Day
Again, I really liked the look of this effect but I didn’t have a great space to make a mess in, plus I found the air was sometimes too powerful - even just on the dryer’s low setting - and moved the wax around more than I wanted it to.
So I experimented next with my next best method: baking my canvas in the oven.
I started by taking the colors I’d chosen for my next canvas piece, removing the wrappers, putting them in separate ziploc baggies, and smashing them lightly with a hammer until they were broken into tiny enough pieces.
Then I sprinkled the broken pieces strategically, color by color, as I wanted them arranged on my canvas.
note: You can put all your crayons into one baggie together — but you’ll have much less control over how your colors are organized when you pour them onto the canvas.
it will be more of a gloriously abstract confetti —
which is cool too!
Finally, I put the canvas in the oven. (on its lowest possible temperature setting which for me is about 180-200 degrees Fahrenheit) It sits straight on the rack for no more than 2-3 minutes before it’s ready to come out.
(i also laid a larger piece of aluminum foil directly underneath my canvas to catch any wax that spilled over.)
It’s super fast, and in no time at all the wax has turned to liquid and your piece is ready to come out of the oven and cool. (This oven bake method only works if your canvas is small enough to fit inside of your oven, obviously!) If you go this route, just make sure to set a timer so you don’t get distracted and walk away for too long.
When you pull out the canvas - making sure to hold it flat - you have about ten seconds of playtime while the wax is still liquid - this ten seconds is by far the most fun part.
Lightly tilt the canvas back and forth, up and down, to continue to blend and swirl and marble your colors together as desired. Within a matter of a half-minute, it will have re-hardened and set. And if you don’t like the outcome? Easy! Stick it back in the oven to let it heat back up, and tilt it around a little more when it’s liquified again. Sprinkle in some more colors and continue until you like what you see!
Check out the video below for some ideas and tips:
I’ve never tried putting crayons straight through the glue gun - but it seems like it works really well from the videos I’ve checked out.
I could imagine it might just be easiest to buy a separate glue gun for melting crayons (since they’re so cheap) so you don’t mess up your gun that’s usually doing other craft projects.
Crayola even makes a crayon melter now — shown with some cool projects on the right and again with the epic pumpkin below. Guess they’ve figured out that crayons aren’t just for kids anymore.
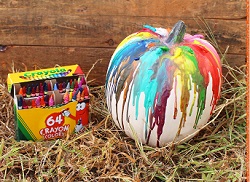

Projects made with Crayola’s Crayon Melter. Check it out and buy it here.
I’ve also recently discovered Colorado based artist Dylan Gebbia-Richards who does INSANELY COOL things with color and pigment, and wax.
His 3D works take on some very funky, otherworldly landscape vibes - and I very much dig it. (Not to mention so many of the pieces seen here are just epic in size, which certainly helps deliver on impact!)
Check out some of his amazing work here:

Artist: Dylan Gebbia-Richards. Artist’s Instagram + Website - Article Source: My Modern Met

Artist: Dylan Gebbia-Richards. Artist’s Instagram + Website - Article Source: My Modern Met

Artist: Dylan Gebbia-Richards. Artist’s Instagram + Website - Article Source: My Modern Met

Artist: Dylan Gebbia-Richards. Artist’s Instagram + Website - Article Source: My Modern Met

Artist: Dylan Gebbia-Richards. Artist’s Instagram + Website - Article Source: My Modern Met
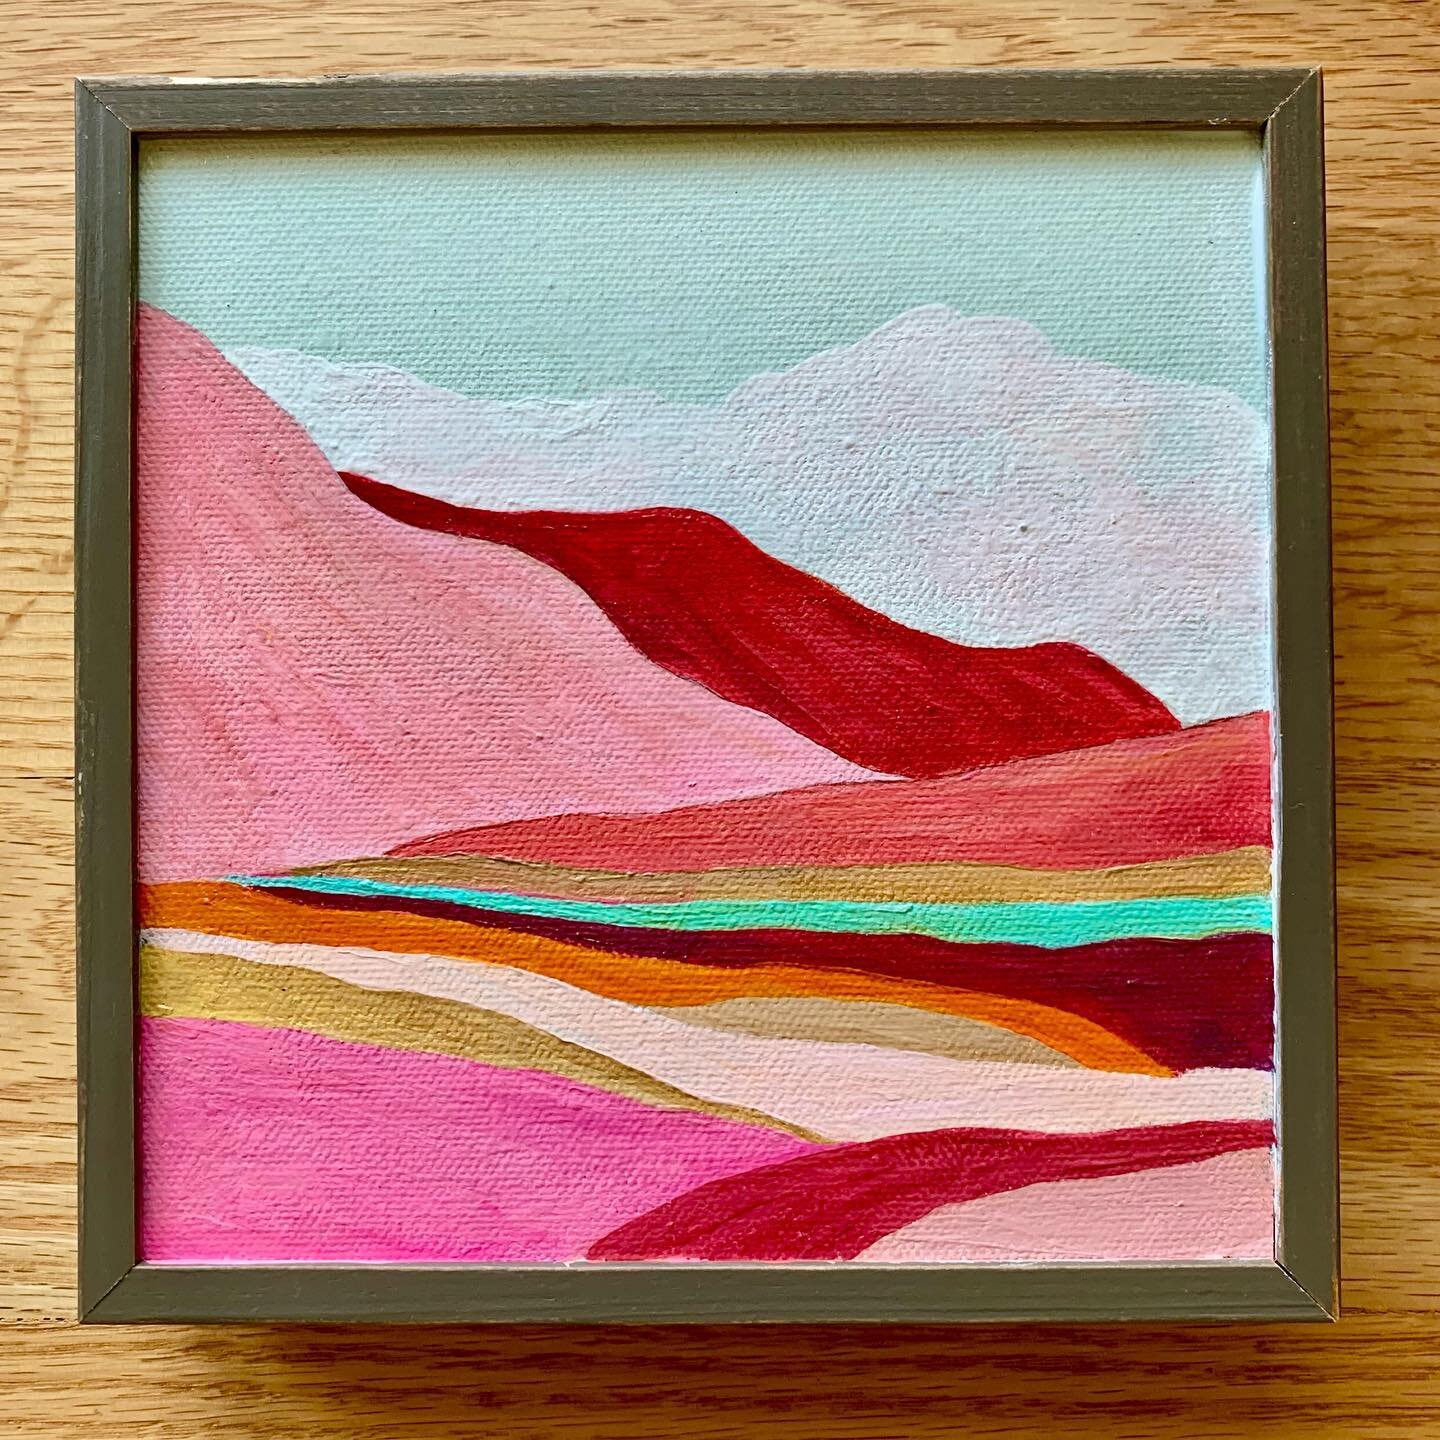
Here are a few of mine that I baked in the oven.
(Never thought I’d be baking my canvases in the oven!)
And like I said, if you’re trying this method, remember to keep your oven temperature set about as low as it will go; and remember to keep an eye on the oven and your piece — as the melting process only takes a few minutes (depending on how much/how little wax you layer onto your canvas).
Lastly: consider putting a big sheet of aluminum foil or parchment paper beneath for any drips or mess.
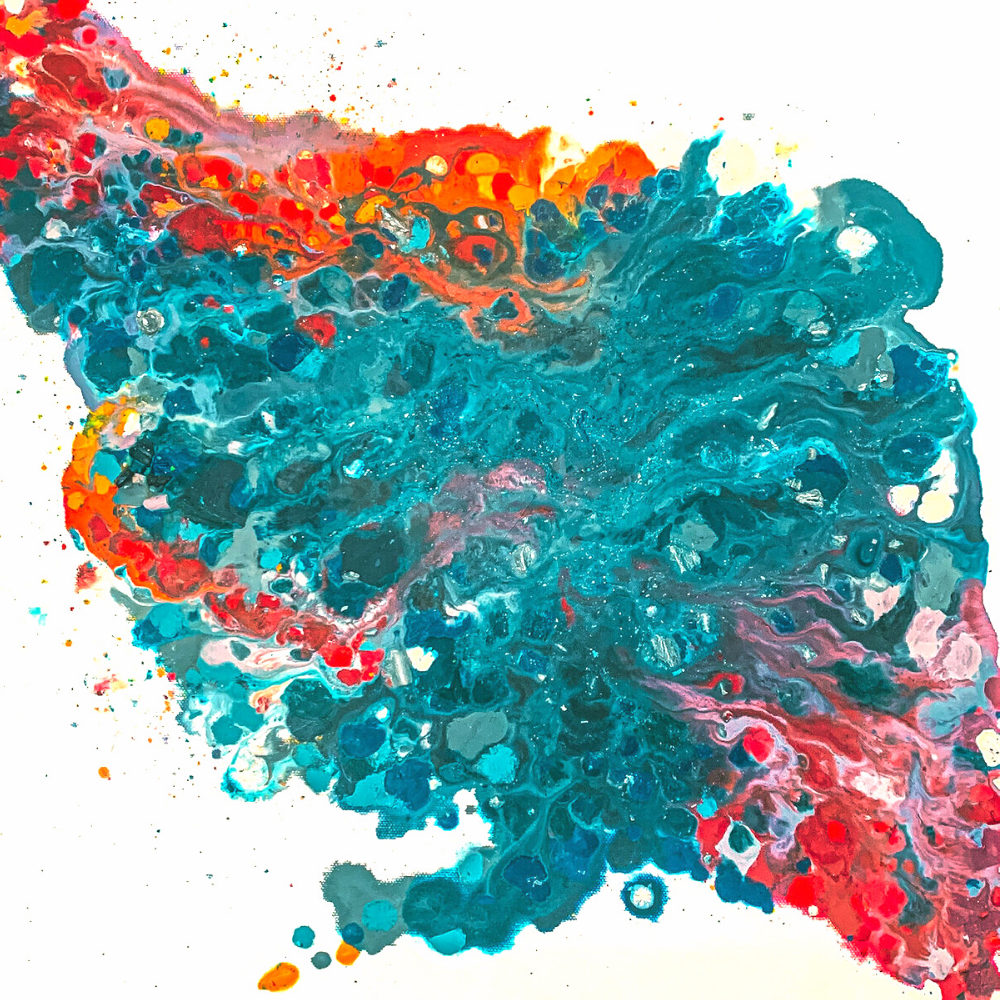
Source: my own photo. This one is about 15”x 15”.


This page contains affiliate links, which means I may earn a small commission if you use those links. For more info please see my Disclosure here.

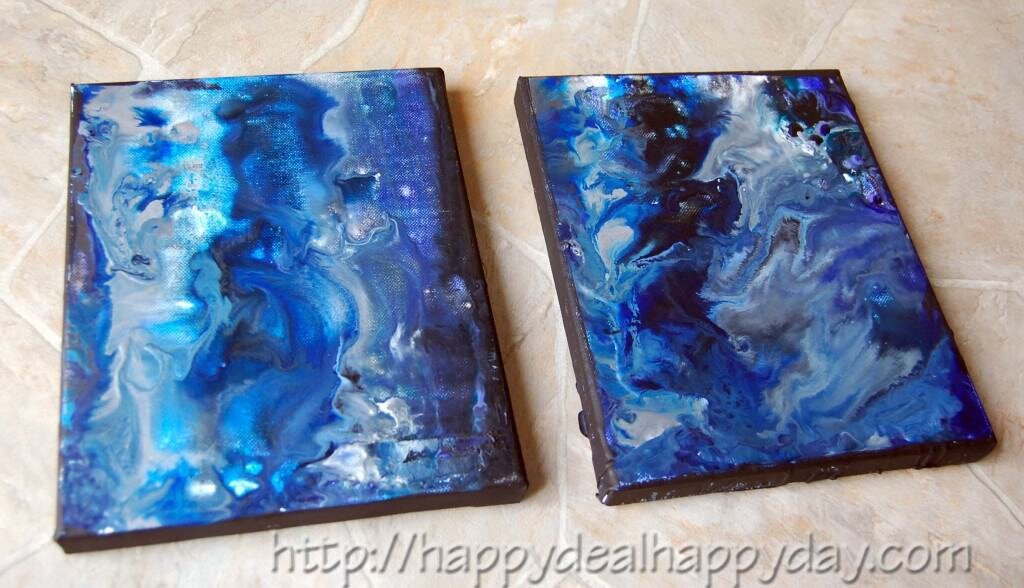
Source: my own photo. About 8”x 8”

Source: my own photo. About 8”x 8”
Have you ever seen the black stretch-mounted canvasses they sell at the craft store?
They’re really cool and work really well in emphasizing melted wax art like this! Plus they save you the trouble of wasting black paint to create a black background.
I bought a few of them back when I made these, and every piece had a serious NASA starry, exploding nebula, outer space vibe.
In the little 8x8 blue + purple colored canvas (shown above on the right) I used a few metallic crayons which I think add a pretty sparkly celestial feel.
There are certain bits of each piece that I find really beautiful — I love how the colors worked and played together overall and how easy it was to continue manipulating when I didn’t like exactly how it was turning out.
I experienced a few times while making each melted wax piece, where I pulled the canvas out of the oven and wasn’t crazy about what a particular spot or area was doing —
— so I’d sprinkle a little more broken up crayon pieces, usually choosing my colors strategically, or choosing white for my existing colors to bleed into and add visibility/brightness. When I finished sprinkling more broken up pieces how I liked it you’re ready to pop your canvas back in the oven for another minute or two to melt the new wax into the piece. Then pull it back out, tilt, swirl, swish, and mix. Repeat as needed, and voila!
If you like getting crafty, making handmade gifts, or a combination of the two, you might also like my article on cool DIY sculpey clay gift ideas!
CLICK TO CHECK it out

Melted wax canvas art makes a great gift, too. Each piece turns out unique — and they’re incredibly fast, easy, and inexpensive to make.
Wax artwork is one of my FAVE DIY gift ideas. I’ve given out several over the years because handmade is always cooler and more special, and— like I mentioned, they’re super duper easy.
They also make a great DIY craft with kids if you’re there to supervise with the oven-stuff
…Or if you’re just bored during COVID-19 quarantine and you need a good social distancing craft. (Grab some friends on Zoom, grab some wine, and see what y’all can make in your ovens in a 20 minute craft-hang-sesh!)
If you’ve never tried your hand at wax art — or just playing around with melted crayons in general — grab a big box next time you’re at the grocery story, craft store, drug store, etc. . . . grab a canvas, and see what happens!
If you’re like me, melting crayons will be the only way you’ll ever want to play with them from here on out.

Like this post? Share it!


You may like these posts, too


Follow me on Instagram!